 We ship worldwide
 Top customer satisfaction!
 Many payment options


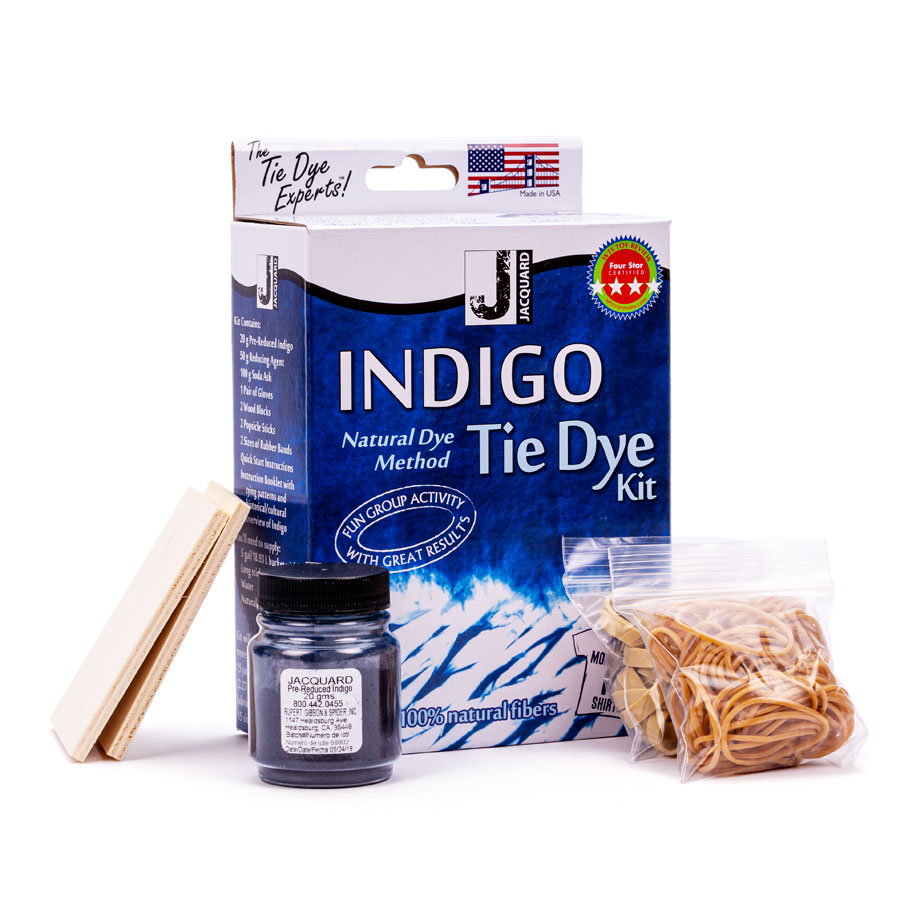
Indigo Tie Dye Kit - Textile Dye Shibori
Available in 1 day, delivery time 1-3 days
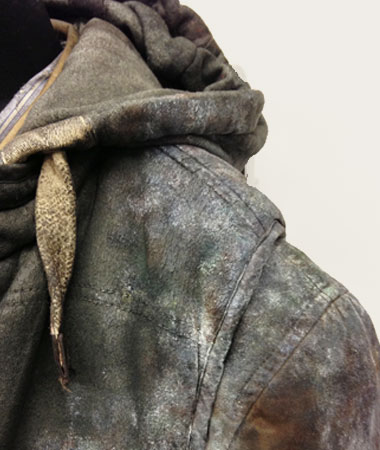
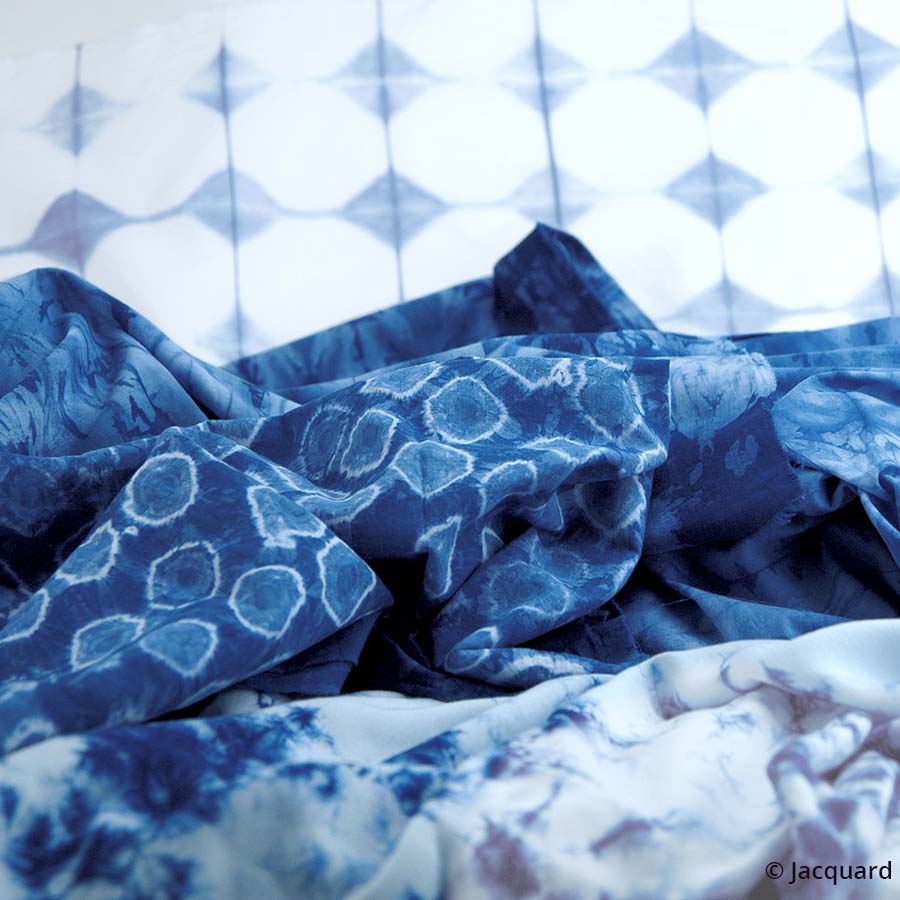
Dyeing awesome blue shades with indigo
This Jacquard Indigo Kit brings home the ancient art of indigo dyeing in a user friendly formulation.
Indigo dye, coming from a plant, is one of the oldest dyes used for colouring fabrics and still used today for dyeing blue jeans.
This natural dye method has long been used in many cultures worldwide.
The unique features of indigo dyeing make it really easy to create wonderful patterns on fabrics.
With the reawakened interest in indigo and ethnic patterns in current fashion collections, this kit will inspire and delight you!
These fibers can be dyed:
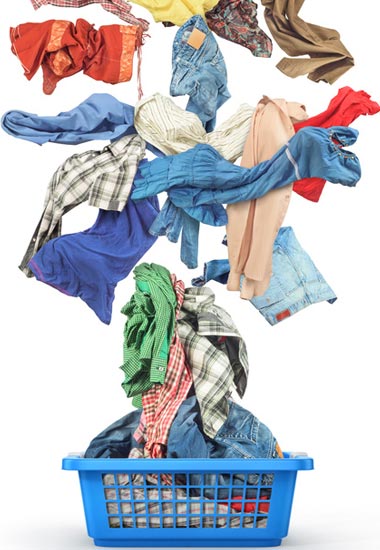
all natural fibers such as: cotton, linen, silk, canvas, hemp, wool, wood and more
How do I dye with the indigo kit?
In addition you need:
• a 20 - 30 L bucket with lid (e.g. ein hobbock bucket - they're very low-priced and high enough for that purpose)
• a long stick for stirring
• 15 L of warm water
• natural fabrics (up to 2,5 kg of fabric or 15 t-shirts)
• possibly a plastic sheet on which you place the bucket (to protect the ground)
Setting up the indigo vat:
1. Fill a 20 L bucket with 15 L of warm tap water (take a high bucket with small diameter).
2. Pour the content of the pre-reduced indigo dye pack into the water. Stir well.
3. While you stir, add slowly the soda ash and the reducing agent (sodium hydrosulfite) to the water.
4. Stir the vat carefully but thoroughly in one direction in circles. As soon as all is well mixed, proceed more slowly, stirring in the other direction. Pull the stick along the outer edge of the vat before removing it. Cover the vat with a lid and leave for at least 15 - 30 minutes. For best results wait for an hour.
5. Once the content of the vat has settled, remove the lid. The top of the dye bath may now be covered with a thin blue skin (rather than the traditional 'foam flower').
Wearing gloves, move the skin (or foam flower) carefully to the side. The dye bath should have a clear yellow or yellow-greenish colour under the flower. If not, wait for another half hour and check again.
The dye bath lasts for several weeks.
Dyeing indigo:
1. Fold, bind or tie your garment or the fabric (see "pattern ideas" on pages 7-11 of the included instructions)
2. Humidify the fabric thoroughly or soak it in water.
3. When you begin dyeing, remove the lid from the bucket. If a thin blue skin is swimming on the surface, push it gently to the side (make sure to wear gloves).
4. Press excess water and air out of the fabric.
5. While still pressing the fabric, dip the textile slowly into the dye vat. Then move the textile carefully to make sure the colour penetrates evenly the parts you have not tied. Move the piece in the vat under the water surface for several minutes. Do not let the fabric fall into the vat or sink to the bottom. As residues will have settled on the bottom, you should not stir these while dyeing. They may stain your dyed piece.
6. When you're ready to take the fabric out of the vat, squeeze it slightly just under the surface while removing it slowly from the vat. Avoid splashes on the water surface as this will return oxygen to the vat. The fabric will be yellow-green like the content of the container. The fabric will turn blue very slowly as soon as the oxygen in the air comes in contact with it. Place the lid back on the container.
7. Put the fabric to the side so that the piece can oxidize completely. Turn the piece frequently to get oxygen everywhere and let oxidize for 20 minutes.
8. When the colour is oxidized you can either repeat steps 4 - 7 to achieve darker blue tones (when wet the colour looks much darker. Once dry a dark blue turns middle blue most of the time). Or remove the excess indigo from the piece through washing with a mild detergent and warm water.
9. As soon as you're done with dyeing, stir gently in circles with the stir stick in the bucket as previously. Place lid back on the vat and leave for at least an hour before using the dye bath again. The dye bath will last several days and you can dye repeatedly.
10. When the dye is exhausted or if you no longer wish to dye, pour the content into the drain. You can clean bucket and utensils with a cleaning agent (e.g. scouring powder) or soap.
If you wish to stock the dye bath: stock the dye in the vat (closed with the lid) in a place with a room temperature of 20-29°C. Keep out of the reach of children and animals.
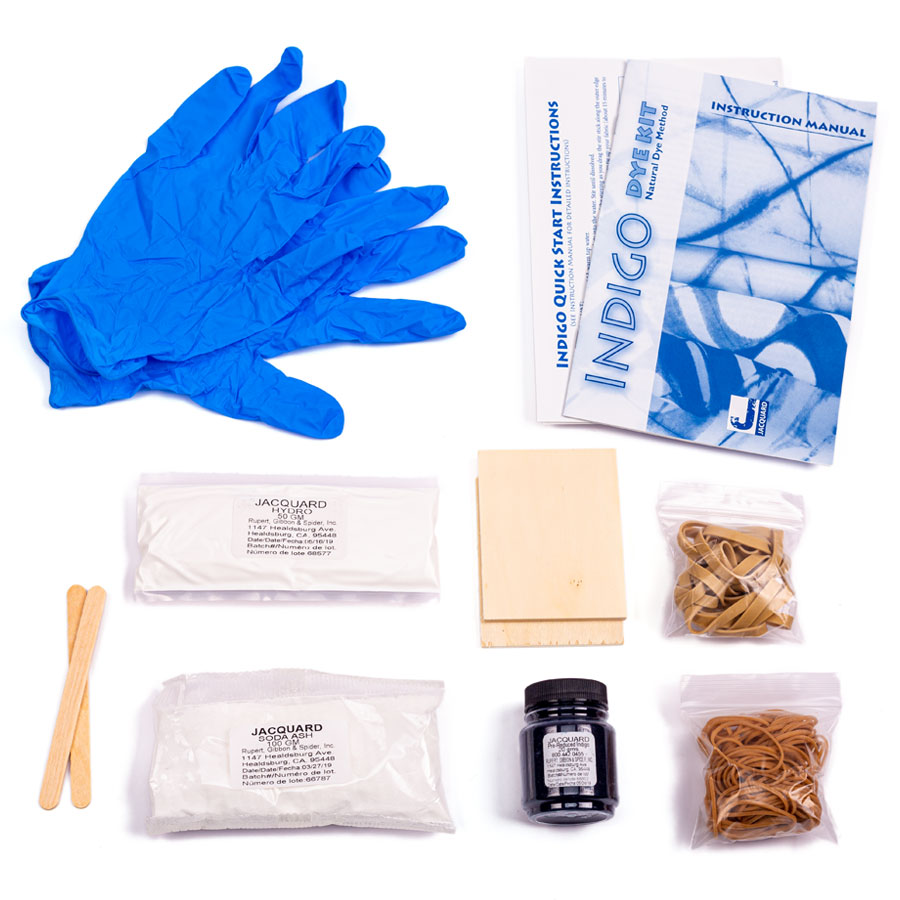
Content of the kit:
• 20g pre-reduced indigo (water soluble)
• 100g sodium carbonate
• 50g sodium hydrosulfite
• 1 pair of protective gloves
• rubbers for tieing
• 2 rectangular wooden boards for tieing
• 2 wooden sticks for tieing
• detailed illustrated instructions on indigo dyeing and traditional folding techniques (in English).
Interesting facts: What exactly is indigo?
Indigo can be found in plants that grow all over the world. It is virtually the only blue colour that occurs in nature.
With its fascinating history, indigo is just as amazing in its application:
The blue colour appears "magically" when dipped fabrics are exposed to oxygen!
This unique property distinguishes indigo from any other dye and makes it particularly suited for pattern techniques.
Indigo produces a large palette of blue shades, from a light sky blue to the deepest navy blue.
Appreciated by countless cultures for thousands of years, indigo is still used today to dye blue jeans.
Jacquard's synthesized indigo is molecularly identical to the naturally occuring dye and is supplied 60% pre-reduced to ensure unprecedented ease of use.
What quantities of fabric can I dye with this kit?
Jacquard's official quantity is 2.5kg of fabric - this corresponds to about 15 t-shirts. However, customers report that much larger quantities can be dyed with it: 1 kit can dye: 30 t-Shirts size M, 30 hankerchiefs, two jeans and one jeans jacket.
Selling unit: 1 kit

Dye indigo:
In addition to the Indigo Tie Dye Kit you need:
• a 20 L bucket with lid (e.g. a hobbock bucket - they're very low-priced and high enough )
• a long stick for stirring
• water
• natural fabrics (up to 2,5 kg of fabric or 15 t-shirts)
• possibly a plastic sheet on which you place the bucket (to protect the ground)
Setting up the indigo vat:
1. Fill a 20 L bucket with 15 L of warm tap water (take a high bucket with small diameter).
2. Pour the content of the pre-reduced indigo dye pack into the water. Stir well.
3. While you stir, add slowly the soda ash and the reducing agent (sodium hydrosulfite) to the water.
4. Stir the vat carefully but thoroughly in one direction in circles. As soon as all is well mixed, proceed more slowly, stirring in the other direction. Pull the stick along the outer edge of the vat before removing it. Cover the vat with a lid and leave for at least 15 - 30 minutes. For best results wait for an hour.
5. Once the content of the vat has settled, remove the lid. The top of the dye bath may now be covered with a thin blue skin (rather than the traditional 'foam flower').
Wearing gloves, move the skin (or foam flower) carefully to the side. The dye bath should have a clear yellow or yellow-greenish colour under the flower. If not, wait for another half hour and check again.
The dye bath lasts for several weeks.
Dyeing of indigo:
1. Fold, bind or tie your garment or the fabric (see "pattern ideas" on pages 7-11 of the included instructions)
2. Humidify the fabric thoroughly or soak it in water.
3. When you begin dyeing, remove the lid from the bucket. If a thin blue skin is swimming on the surface, push it gently to the side (make sure to wear gloves).
4. Press excess water and air out of the fabric.
5. While still pressing the fabric, dip the textile slowly into the dye vat. Then move the textile carefully to make sure the colour penetrates evenly the parts you have not tied. Move the piece in the vat under the water surface for several minutes. Do not let the fabric fall into the vat or sink to the bottom. As residues will have settled on the bottom, you should not stir these while dyeing. They may stain your dyed piece.
6. When you're ready to take the fabric out of the vat, squeeze it slightly just under the surface while removing it slowly from the vat. Avoid splashes on the water surface as this will return oxygen to the vat. The fabric will be yellow-green like the content of the container. The fabric will turn blue very slowly as soon as the oxygen in the air comes in contact with it. Place the lid back on the container.
7. Put the fabric to the side so that the piece can oxidize completely. Turn the piece frequently to get oxygen everywhere and let oxidize for 20 minutes.
8. When the colour is oxidized you can either repeat steps 4 - 7 to achieve darker blue tones (when wet the colour looks much darker. Once dry a dark blue turns middle blue most of the time). Or remove the excess indigo from the piece through washing with a mild detergent and warm water.
9. As soon as you're done with dyeing, stir gently in circles with the stir stick in the bucket as previously. Place lid back on the vat and leave for at least an hour before using the dye bath again. The dye bath will last several days and you can dye repeatedly.
10. When the dye is exhausted or if you no longer wish to dye, pour the content into the drain. You can clean bucket and utensils with a cleaning agent (e.g. scouring powder) or soap.
If you wish to stock the dye bath: stock the dye in the vat (closed with the lid) in a place with a room temperature of 20-29°C. Keep out of the reach of children and animals.
Login
September 20, 2023 18:51
Indigo Dye Kit
Der Wahnsinn! Musste Stoff nachkaufen - da so ergiebig. Mega Farbergebniss. Lieferung war da, bevor man "Batiken" sagen konnte. Hab schon mehr bestellt :)
May 15, 2021 13:51
Guter Service, viele Infos!
Die Deka-Farben habe ich noch nicht ausprobiert, aber das Indigo Färbeset und ich bin begeistert. Versand ging sehr schnell und ich finde es toll, dass es soviel extra Infos zu dem Thema färben gibt. Ich würde mich aber freuen, wenn man noch zu dem Thema Stoffe färben und Verträglichkeit für die Umwelt der verschiedenen Marken erfährt (außer, dass es natürlich nachhaltig ist alte Stoffe/Textilien durch färben wieder aufzuwerten).
April 14, 2020 15:53
Magnifique couleur
c'est vraiment génial, ce kit complet de teinture. Alors, lancez-vous ! Et avec en plus le mode d'emploi sur le site, pas de soucis. Mais de très beaux résultats à tous les coups. Suis très contente. 10 points, c'est sûr.
April 6, 2020 18:31
Neues schönes Hobby
Die Coronakrise 2020 hat mir ein neues Hobby beschert: das Indigo Färben Ich habe mir dieses nette kleine Set gekauft und direkt meine weiße Stoffserviettensammlung damit gefärbt. Es ist sehr einfach herzustellen und das Ergebnis sieht super aus. Ich werde nun viele Dinge färben: Bettwäsche, Tücher und auch Kleidung Ab sofort gibts nur noch Shibori Geschenke für alle Freunde und die ganze Familie ;-)
April 4, 2020 15:26
Wunderschönes Ergebnis
Schade, dass ich hier keine Fotos posten kann. Ich wollte schon immer Shibori mit Indigo färben. Im normalen Hobbyladen findet man kein Indigo. Im Set ist alles enthalten und ich muss keine Chemikalien separat in der Apotheke kaufen. Das Ergebnis ist super geworden und ich werde jetzt öfters mit Indigo färben. Dieses Blau ist schon einmalig schön!
January 31, 2020 16:08
Super
Perfekt
Accessories


Content: 10 Gram (€0.30* / 1 Gram)

Content: 0.5 Kilogram (€89.90* / 1 Kilogram)

Content: 0.023 Kilogram (€302.17* / 1 Kilogram)


Content: 10 Gram (€0.32* / 1 Gram)

Content: 14 Gram (€0.46* / 1 Gram)
Similar Products


Content: 100 Piece (€0.05* / 1 Piece)

Content: 0.45 Kilogram (€42.11* / 1 Kilogram)


Content: 0.023 Kilogram (€302.17* / 1 Kilogram)
Customer Also Viewed

Content: 0.227 Kilogram (€250.88* / 1 Kilogram)

Content: 4 Piece (€3.24* / 1 Piece)
Customer Also Bought

Content: 0.014 Kilogram (€389.29* / 1 Kilogram)

Content: 14 Gram (€0.50* / 1 Gram)


Content: 0.5 Kilogram (€3.70* / 1 Kilogram)

Content: 0.014 Kilogram (€389.29* / 1 Kilogram)

Content: 14 Gram (€0.50* / 1 Gram)

Content: 0.5 Kilogram (€129.90* / 1 Kilogram)

Content: 10 Gram (€0.32* / 1 Gram)

Content: 0.5 Kilogram (€149.90* / 1 Kilogram)